Prices include taxes. Free shipping over $300.
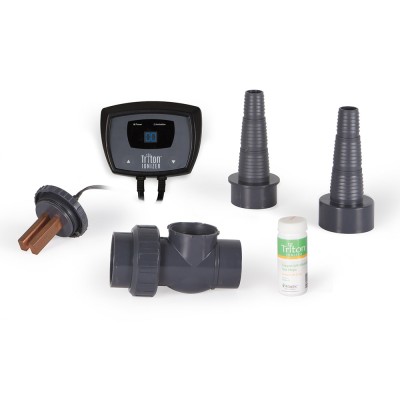
Atlantic is pleased to introduce the new Triton™ Ionizer 3 to control string algae and green water in water gardens, fish ponds and pond free ponds. This low voltage water management system electronically introduces microscopic ions of copper, silver and zinc into the water which control organic growth and helps keep ponds crystal clear. This mineralized water is not only safe for animals and plants, but actually promotes healthy living conditions in the water. Mineralized water maintains a residual ability to treat organics and is not affected by heat or sunlight, greatly reducing the need for chemical treatments.

Triton Ionizer 3 Features:
- Safe for fish and plants
- Low maintenance
- Clears water without the use of harsh chemicals
- Easily installed in any new or existing water feature
- Treats ponds up to 25,000 gallons
- Level of mineralization is controlled by the LED panel
- Cast mineral anodes are self-cleaning
Model: TRION 3
Description: Electronic Water Clarifier
Application: Pond / Pond-free / Fountain
Voltage: 12 Volt
Inlet: 2" sch 40 PVC
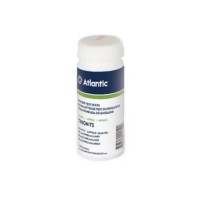
Includes: Outdoor transformer and copper test strips
Installing Your Pond Ionizer
Complete detailed instructions and trouble-shooting guide included with your Triton Ionizer 3
 Mount the control panel in the desired location. The control panel is weather proof, but should be mounted on a wall or post above ground level. Ensure that the power cord is within reach of a properly grounded GFCI outlet, and that the electrode cord will reach the desired installation point.
If installing the Triton Ionizer in conjunction with Atlantic Pro Series skimmers, the electrode housing should be plumbed into the waterfall inside the pump chamber in the back of the skimmer. (Fig.1)
If installing the Triton Ionizer in conjunction with Atlantic Oasis Series skimmer, the electrode housing will need to be installed in a valve box just outside of the skimmer. The valve box must be located in an area accessible for maintenance and winterization.
Measure the feed line to determine the proper placement of the electrode housing. (Fig.2) The electrode housing should be installed in the center of the waterfall supply line, between the check valve and the outside wall of the skimmer.
Note: The electrode housing utilizes 2”sch40 slip connections and can be installed in a 2” flexible PVC supply line using standard glue and cleaner. Additional fittings (not included) may be required to adapt the electrode housing to a specific sized pipe.
Using a hacksaw, PVC saw or PVC cutters;remove a 2 ½” section of the waterfallsupply line. (Fig.3) Dry fit the electrode housing and waterfall supply line to verify that they line up properly.
Install the electrode housing in a horizontal position with the threaded port facing the front of the skimmer. Fig.4) Connections can be made using standard PVC glue
and cleaner.
A red dot has been placed on the top of the electrode fitting to ensure proper alignment. When fully tightened, the red dot must be aligned with the waterfall supply line on either the inlet or outlet side of the electrode housing. This will orient the probes side-by-side and allow water to flow between the electrodes
rather than around them. Wrap the threads with Teflon tape or apply a thin layer of plumbing paste prior to installing electrode. This will ensure a water tight connection and make it easier to remove the electrode for inspection or replacement.
Install the copper electrode (Fig.5), tighten the fitting by hand and then finish
with 1-2 additional turns using a wrench, making sure that the red dot aligns with the center of the waterfall supply line.
Connect the control panel to the electrode. Fig.6)
The Triton Ionizer can also be installed inside of Atlantic pump vaults when used in pond-free water features. (Fig.7)
Triton™ Ionizer 3 Pond Clarifier
- Brand: Atlantic®
- Product Code: Triton™ Ionizer 3 Pond Clarifier
- Availability: In Stock
-
$445.50
- Price includes taxes.
Free shipping over $300.
Related Products
PL™ Beneficial Pond Bacteria Microbe-Lift
Microbe-lift PL™ provides sustained biological activity in water temperatures even under 55 degrees...
$40.50
Replacement Diode fits Triton™ Ionizer 2 and 3 Pond Clarifier
This replacement diode fits the Triton™ Ionizer 2 or Triton Ionizer 3 from Atlantic.. ..
$125.50
IonGen™ 2nd Generation Ionizer by Aquascape®
The IonGen™ second-generation electronic water clarifier for ponds, pondless waterfalls and other de..
$485.50
Copper Test Strips by Atlantic®
These easy to read 3 in 1 test strips from Atlantic® measure Copper / Alkalinity and pH. Just swirl ..
$22.50

